When transporting a kayak on the roof of your car, you need to make sure you’ve secured it properly - otherwise, you run the risk of damage to your vehicle or your kayak coming loose during the trip. At Nationwide Trailer Parts, we’re here to show you how to properly tie down your kayak. Once you’ve practised a few times, you’re ready to hit the road and the water!
Step One: Prepare your roof rack by placing padding blocks on the top of the roof rack bars or padding that wraps around the bars themselves. This will ensure that the kayak doesn’t damage your car roof during the drive.
Step Two: Secure the kayak with cam buckle straps. By using straps that are designed specifically for tying down kayaks, you’re ensuring that your journey is easier and safer! The cam buckle straps will allow you to tighten the kayak to the roof rack without risking over-tightening and damage to the kayak.
Step Three: Now it’s time to secure the bow and stern of the kayak to your car. Use bow and stern lines with a cam buckle or ratchet strap attached to ensure that your kayak cannot lift or detach itself from your car. The cam buckle can be easily tightened to keep the bow and stern lines in place.
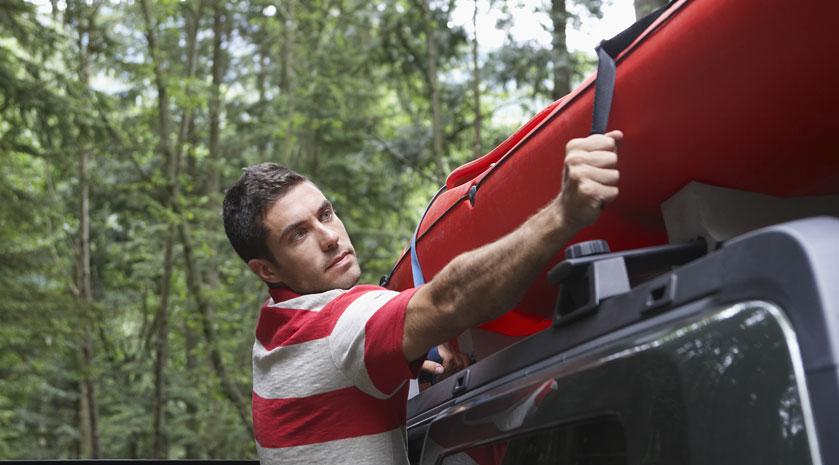
Step Four: Lift the kayak onto the roof rack, ensuring that it is right side up. This is often a two-person job so take care when lifting! The bow of the kayak should be at the front of the car and the stern at the back.
Step Five: Adjust the kayak so that it is in the middle of the two roof rack bars. Once it is in the middle, centre the kayak between the two sides of the car to avoid unequal weight distribution.
Step Six: Take one of the cam buckle straps and using the bare end, run it over the kayak and loop under the roof rack bar. Leave the strap with the cam buckle attached hanging on the other side of the car and once the end of the strap has been looped under the roof rack bar, pull the slack at the end up into your hand.
Step Seven: throw the end of the strap without the cam buckle across the kayak to the other side of the car. Walk around an take the strap end, looping it under the same roof rack bar. Make sure you are using the same roof rack bar, on the opposite side of the kayak. Loop this the same way as you did the other side of the car.
Step Eight: Take the bare end of the strap and run through the cam buckle, closing the strap and securing the kayak to the roof rack bar. Place the bare end of the strap through the slot in the cam buckle and pull the strap through until all of the slack has gone.
Step Nine: Secure the kayak by tightening the strap with the cam buckle. To do this, pull on the bare end of the strap so that more slack comes through the cam buckle. The kayak should be tight enough so that the kayak does not shift but not so tight that the kayak gets damaged.
Step Ten: Complete the same process with the strap on the other side and ensure that the kayak is secure. To further prevent damage, wrap the strap ends around the roof rack bars to ensure they do not get caught during your journey.
Finally, ensure that all of your straps are secure and you’re ready to drive. Some of these steps may take a few tries to get perfect, but it’s always best to take your time and get it right! Take a look at our full range of load restraint products or contact a member of the Nationwide Trailer Parts team for advice and guidance.